This will be my first tutorial so bear with me while I am unbearably poor at it. I am sure if I get better I will come back and fix it.
First a picture to get you interested.....
For these bowls you will need several yards/metres of piping cord (cotton cord) . I have used several different thicknesses and usually just use whatever I have on hand. Today I had this which was just under 1/4 '' wide. If you use anything thicker than this you will probably have to use a denim needle, my new Bernina requires a mini screw driver for needle changes so now I avoid them at all costs.Lazy.
Here I used 4 WOF* strips approx 1/2'' wide, sometimes you need more or less depending on the width of your cord, the size of the bowl you are making and how tightly you wrap the cord.
*width of fabric approx 44-45''.
To start set you machine to a zig zag ,
Don't worry if your zig zag doesn't go this wide , my old machine only went up to 5 and it worked just fine.
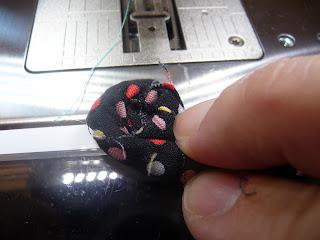
Grab your cord and one piece of fabric and tightly wrap the end so all the white cord is covered. Start to roll it like a snail until there is about 2 circles and then pop it under your sewing machine foot.
Slowly start your zigzagging going back and forth until its secure. If you have a needle down function switch it on, it helps a lot. If not make sure you put your needle down manually every time you stop to wrap the cord.
Start slowly turning your "snail" and at the same time continue to wrap the fabric around the cord. Continue to sew and turn , sew and turn until you are nearly at the end of the fabric. Grab another piece of fabric and wrap it around the end of the other piece and continue on.
When you have made a circle large enough for the bottom of the bowl (depending on how big you want the finished product) simply tilt the circle up and keep sewing and wrapping the cord .
Pretty simple eh?
Continue on until you have made a bowl the size you wish , keeping it tilted and wrapping new pieces of fabric as necessary. When you are ready to finish up simply cut the cord 1/2'' inch before the end of you fabric strip and wrap the end of the cord so its all covered.
When you get to the wrapped up end simply lay it over the inside of the bowl and sew back and forth a few times to secure . Snip the threads and you're done!!


No comments:
Post a Comment